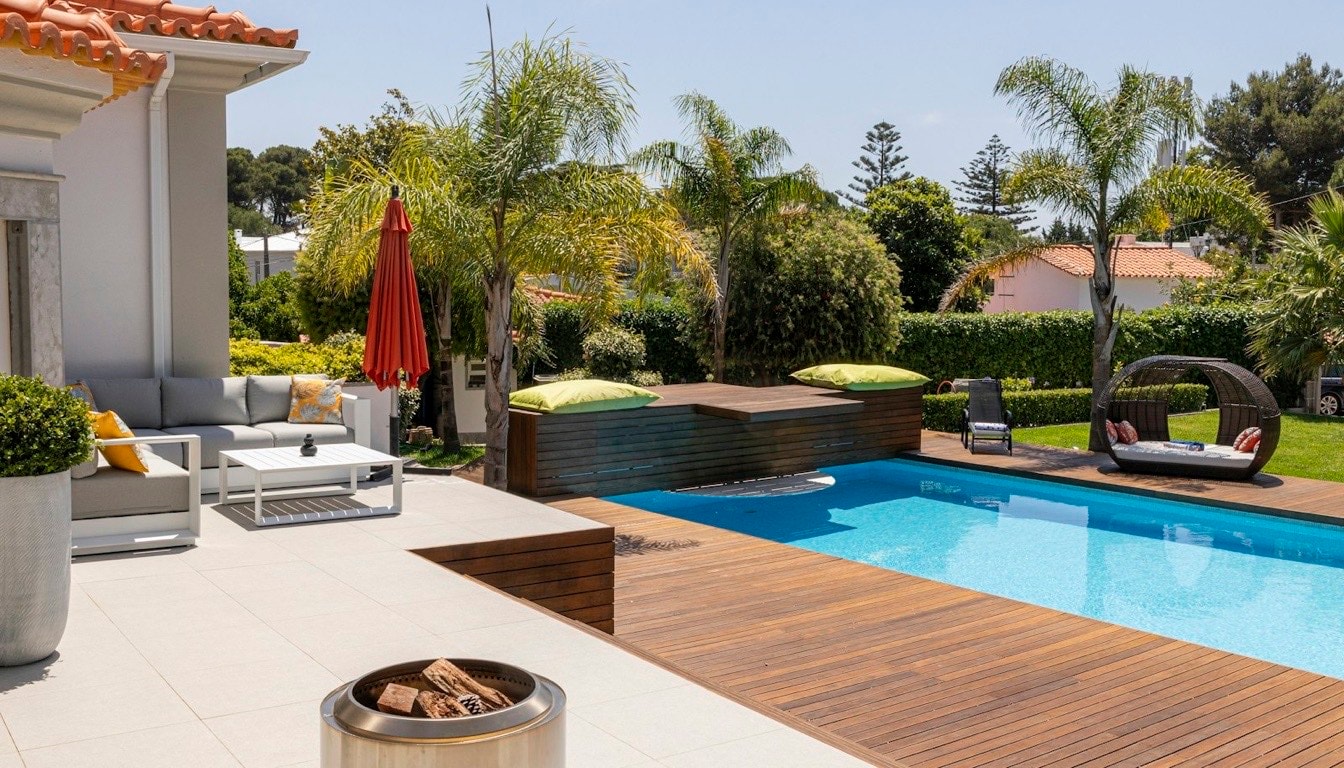
Most Tampa Bay homeowners start thinking about a new lanai or outdoor kitchen in June, sitting inside with the air conditioning on, watching an afternoon storm roll across the yard. By then the best building months are already behind them. The outdoor spaces that are ready to enjoy by spring are the ones planned in the fall, when the rainy season has just shown you where the water goes, the air is finally comfortable enough to stand in the yard and think, and the drier months ahead are open for construction.
This checklist is for Tampa and St. Pete homeowners planning luxury outdoor living spaces: covered lanais, outdoor kitchens, pool decks, pergolas and screen enclosures. It follows the order the decisions should be made in, from reading the yard to choosing the last finish, with the lighting, electrical and audio-visual work that is easy to plan now and expensive to add later. Work through it this fall and you’ll come to a design meeting with answers instead of questions.
Key Takeaways
- Fall is planning season. Design, engineering, permits and HOA review take time, so decisions made in October and November let construction use the drier months and finish before the next rainy season and hurricane season.
- Walk the yard now, while the summer’s drainage problems are fresh, but design the shade for the high summer sun, not the low autumn sun you’re standing in.
- Lighting, power, gas, water and low-voltage cable run under the deck and through the roof framing. Every fixture, outlet, speaker and camera should be on the plan before the first paver is set.
- Choose finishes for direct sun, downpours and salt air: 316 stainless, powder-coated aluminum, light-colored pavers or porcelain, and fixtures rated for the location they’ll live in.
Why Fall Is the Time to Plan
Tampa Bay’s year splits roughly in two. The summer rainy season, from about June through September, brings near-daily afternoon thunderstorms, heat and humidity. The Atlantic hurricane season runs from June 1 to November 30. From late fall through spring, the weather turns drier and milder. For outdoor construction, that drier stretch is the window you want: concrete, pavers and sealers prefer dry days, crews lose fewer afternoons to lightning, and open trenches don’t fill with water.
But an outdoor project can’t start the week you decide you want one. Before anything is built, the layout has to be designed, selections made and priced, the roof or pergola engineered for wind loads, a permit issued, and, in most Tampa Bay neighborhoods, an HOA architectural review completed. Each of those steps depends on the one before it. Planning in the fall is what puts the build in the dry months instead of pushing it into next summer’s storms.
Fall has a second advantage: you’ve just lived through a rainy season. You know where water stood on the patio, which corner of the yard stayed soft for days, and how hot the old deck got at four in the afternoon. That knowledge is worth writing down before it fades.
Your Fall Planning Checklist
The items below follow the order we work through them with clients. The early ones shape everything after them, so resist the urge to choose a grill or a paver color first.
1. Walk the yard after the rainy season
- Note where water pooled against the house, around the pool or on the existing patio, and how long it stayed.
- Look at gutters and downspouts. Where do they empty, and will a new lanai roof add water to the same spot?
- Check for settled or rocking pavers, cracked slabs and soft ground. Settling usually means a thin or poorly compacted base, and it tells you what the new work has to do differently.
- Find the existing utilities: the pool equipment pad, the gas meter, outdoor outlets and hose bibs. Their locations affect where an outdoor kitchen makes sense.
Grading and drainage are the least glamorous part of an outdoor space and the part that decides whether it lasts. A well-built deck is graded so water runs away from the house and the pool, and set on a compacted base so it doesn’t sink or shift.
2. Map sun and shade for summer, not for today
- Note which side of the house the outdoor space faces. A west-facing lanai takes the full force of the afternoon sun, exactly when you’re most likely to use it.
- Remember that the autumn sun is lower and further south than the summer sun. In June and July the sun sits higher overhead and sets further to the northwest, so shade that works on a November afternoon may miss the seating area in summer.
- Decide where you’ll actually sit, eat and cook, and put shade there: a solid lanai roof, a pergola with a louvered or covered top, or a combination.
- Think about the view from inside. A new roof can darken the rooms behind it, which is worth weighing before it’s drawn.
3. Decide how you’ll use the space
- How many people do you host, and how often? A table for eight needs a very different footprint from a lounge for two.
- Will you cook outside regularly, or occasionally? A full outdoor kitchen with a sink, refrigeration and a vent hood is a different project from a grill station.
- Do you want the outdoor room to read as an extension of the inside, with matching flooring tones, aligned doors and continuous ceiling lines?
- Who uses the pool, and when? Children, guests and evening swims all change where lighting, railings and seating go.
This is where design earns its keep. Our interior design and space planning team works out how a room is used before it’s drawn, and an outdoor room deserves the same thinking, especially where it meets the living room or kitchen through a wall of sliding doors.
4. Choose the structure and start approvals early
- Decide between a covered lanai roof tied into the house, a freestanding or attached pergola, a screen enclosure, or a combination.
- Expect the roof, pergola or screen enclosure to be engineered for wind loads and built under a county or city permit, with footings and slabs inspected before they’re covered.
- Check your property’s setbacks and, if you have one, your HOA’s architectural guidelines. Some associations limit roof materials, colors, heights or screen styles, and most review submissions on a set schedule.
- Ask how the new roof will drain. A lanai roof that sheds water back toward the house is a problem for decades.
These approvals are the main reason fall planning matters. A design finished in November can be engineered, submitted and approved while the weather is still on your side. A design finished in April usually can’t.
5. Plan the lighting and electrical
Outdoor lighting is what turns a sunny deck into a place you use at night, and it’s almost entirely decided by what goes into the ground and the roof framing before they’re closed. Plan it now:
- Layers: ambient light from the lanai ceiling, task light over the grill and prep counter, and accent light on steps, paths, palms and the pool.
- Ratings: fixtures under a covered roof need to be rated for damp locations, and fixtures exposed to rain need a wet-location rating. The same applies to ceiling fans.
- Outlets: outdoor receptacles need GFCI protection and weather-resistant covers that stay closed while something is plugged in. Place them where you’ll want a blender, a heater or holiday lights, not just where it’s convenient to wire.
- Circuits and capacity: an outdoor kitchen, ceiling fans, a pool heater and lighting all add load. A load calculation tells you whether your panel can carry it before the design is final.
- Controls: dimmers, separate switching for each zone, and timers or scenes so the landscape lighting comes on at dusk without anyone thinking about it.
- The pool: if the project includes a new pool deck, the electrical code requires the deck around a pool to be bonded, and that bonding is inspected. It belongs in the plan, not discovered during the build.
Our electrical and lighting upgrades team plans outdoor lighting the same way we plan a kitchen: in layers, with switch and dimmer locations marked on the drawings, and adjustable fixtures aimed after dark once everything is installed.
6. Prewire for audio, video, Wi-Fi and cameras
Outdoor speakers, a television on the lanai, a wireless access point that reaches the pool, and security cameras covering the gate and the back door all need cable or conduit. Running it before the pavers go down and the ceiling closes is simple. Running it later means cutting through finished surfaces.
- Mark speaker positions for the lanai and the yard, and decide whether music in the pool area should be a separate zone.
- If you want a TV outside, plan the wall backing, the power and the signal cable to that exact spot, and choose a screen made for outdoor use.
- Decide which approaches cameras should cover, and run power and data to each location.
- Ask for spare conduit under the deck to the places you might want something later. It costs little now and saves a lot.
Equipment outdoors has to stand up to salt air and summer storms. Our smart home and AV prewire team plans every outdoor device with the electrical layout, so nothing has to be added through a finished ceiling.
7. Route gas, water and drains for an outdoor kitchen
- Choose your grill, side burners, refrigeration and any pizza oven or flat-top before the island is drawn. The island is built around the exact appliances.
- Plan the gas line route from the meter or tank, and the water supply and drain for any sink.
- Decide whether a grill under a covered roof needs a vent hood, and where it will exhaust.
- Expect gas, water and electrical lines to run underground and be inspected before anything is covered.
8. Choose finishes for sun, storms and salt air
Finish selections are the fun part, and the part where Florida is least forgiving. Every material outside faces direct sun, heavy rain and, near the water, salt air, all year.
| Element | What to look for | Why it matters here |
|---|---|---|
| Deck and lanai floor | Light-colored pavers or porcelain on a compacted base | Lighter surfaces stay cooler underfoot, and a proper base keeps them from sinking after storms |
| Grills and hardware | 316 stainless steel | Lower grades of stainless can rust and stain in salt air |
| Screen enclosures and railings | Powder-coated aluminum | Resists corrosion and holds its finish in direct sun |
| Countertops | Stone suited to outdoor use, sealed | Sun, heat and spills are harder on stone outside than in a kitchen |
| Lighting and fans | Damp- or wet-location ratings to match their position | Fixtures rated for indoor use fail early outdoors |
| Fabrics and cushions | Solution-dyed outdoor fabrics with quick-dry fill | Resist fading and dry out between afternoon storms |
Bring samples outside and look at them at different times of day. A stone that looks warm in the showroom can read cold in full Florida sun, and a paver that looks pale in the box can turn out darker, and hotter, once it’s sealed.
9. Price every selection before you break ground
- Ask for a quote built from your actual layout, materials and site conditions, including grading, footings and underground lines, not a per-square-foot estimate.
- Compare materials side by side where you’re undecided, so the choice is made on cost and performance together.
- Hold a contingency for what the ground reveals, such as old footings, roots or buried lines.
- Decide what comes later, if anything. A summer kitchen can wait a year if the gas line and power are already run to where it will go.
A Seasonal Timeline for a Spring-Ready Outdoor Space
Every project moves at its own pace, depending on its scope, engineering and approvals. As a general shape, a project planned this fall can follow a sequence like this:
| Season | What happens |
|---|---|
| October–November | Walk the yard, settle how the space will be used, design the layout and choose the structure |
| November–December | Plan lighting, power, AV and kitchen utilities; make and price selections; prepare engineering and HOA submissions |
| Winter | Permits and approvals; site layout, grading, footings and underground utilities |
| Late winter–spring | Framing and roof, pavers, kitchen island, screen enclosure, trim-out of lighting, fans and AV |
| Before summer | Final inspections, a dusk walkthrough with the lights on, and a hurricane checklist for what to secure when a watch is posted |
Larger projects, or ones waiting on an HOA board or special-order materials, may run longer. The point isn’t a fixed calendar. It’s that each step leans on the one before it, and starting in the fall gives every step room.
What to Ask Before You Hire an Outdoor Living Builder
If you’re comparing companies for a luxury outdoor living space in Tampa, these questions separate a builder who plans the whole space from one who installs a single piece of it:
- Who designs it? Is the layout drawn by the same team that builds it, or handed to you to coordinate between a designer, a paver crew, an electrician and an AV installer?
- Who handles engineering, permits and the HOA? These steps take the most calendar time, and someone has to own them.
- How is drainage handled? Ask how the yard will be graded and where the new roof’s water goes.
- Is the lighting and AV on the drawings? If outlets, fixtures and speakers aren’t marked before construction, they tend to end up wherever is convenient.
- What materials do you specify for salt air? Listen for specifics, such as 316 stainless and powder-coated aluminum, not general reassurance.
- How is the price built? A quote from your real layout and selections, with everything priced before work starts, is one you can rely on.
- What happens at handover? A good builder tests every burner, fan, light and outlet, closes out inspections and leaves care instructions for the stone, stainless and sealers.
Planning Your Outdoor Space with Ethicore
Ethicore designs and builds outdoor kitchens, covered lanais, pool decks, pergolas and screen enclosures across St. Petersburg and Tampa Bay, as one design-build team. We start with a walk of your yard, noting where the afternoon sun lands and where water collects after a storm, then lay out the space and choose materials for Florida weather. The same team handles the wind-load engineering, permits, HOA review and construction, and the lighting, power and low-voltage cable are planned with the layout rather than added after it.
With more than 40 years of experience and over 1,300 projects completed, we know which decisions make an outdoor room last and which ones are hard to undo. Every project begins with a free consultation. If you’d like to be outside in a finished space next spring, book your consultation this fall and show us your backyard.
Frequently Asked Questions
When is the best time to build an outdoor living space in Tampa?
The drier months, from late fall through spring, are the most comfortable and predictable time to build outdoors in Tampa Bay, with fewer afternoon storms to stop work and drier conditions for concrete, pavers and sealers. Because design, engineering, permits and HOA review come first, the best time to plan is the fall before.
Do I need a permit for a lanai roof or pergola?
In Tampa Bay, lanai roofs, pergolas and screen enclosures are generally built under a permit, with engineering for wind loads and inspections of footings and slabs along the way. Setbacks and HOA guidelines also apply in many neighborhoods. A design-build team can handle the engineering, permit and HOA submission for you, so the structure is on record when you insure or sell the house.
What is the best surface for a pool deck in Florida?
Light-colored pavers and porcelain are popular choices because they stay cooler underfoot than dark surfaces and hold up to sun and pool water. More important than the material is what’s underneath: a deck graded to drain away from the house and pool, set on a compacted base so it doesn’t sink or shift. Ask to see samples outside in full sun before you choose.
Can I add outdoor speakers or a TV to an existing lanai?
Usually, yes, but it’s far simpler during a remodel. With the ceiling open and the deck not yet set, power and cable can run exactly where they’re needed. On a finished lanai, wiring has to be routed around existing surfaces. If you’re planning any outdoor work, run conduit for future speakers, cameras or a TV while you can.
How much does a luxury outdoor living space cost in Tampa?
It depends on what you build and where. The biggest drivers are the structure (a covered lanai roof versus a pergola or screen enclosure), the size of the deck, whether there’s a full outdoor kitchen with gas, water and a drain, the lighting and AV, the finishes, and site work such as grading and footings. We quote every outdoor project to its own layout, materials and site conditions, so you see the full cost before we break ground.